Set up Synthetic API Tests
Overview
Synthetic API tests provide quick validation of API behavior through the Signadot UI. Use them for:
- Basic API health monitoring
- Simple invariant checks
- Breaking change detection
For comprehensive SmartTests needs, use Git-based SmartTests instead.
Setup Requirements
Before you begin:
- Install Signadot Operator v0.19+ in your cluster
- Enable Managed Runner Groups in your Signadot Dashboard
- Verify at least one runner pod is active in your cluster
Note: Synthetic tests only run on in-cluster sandboxes and are not available for sandboxes with local mappings.
Writing Tests
Navigate to "Smart Tests" in the dashboard and click "Create New":
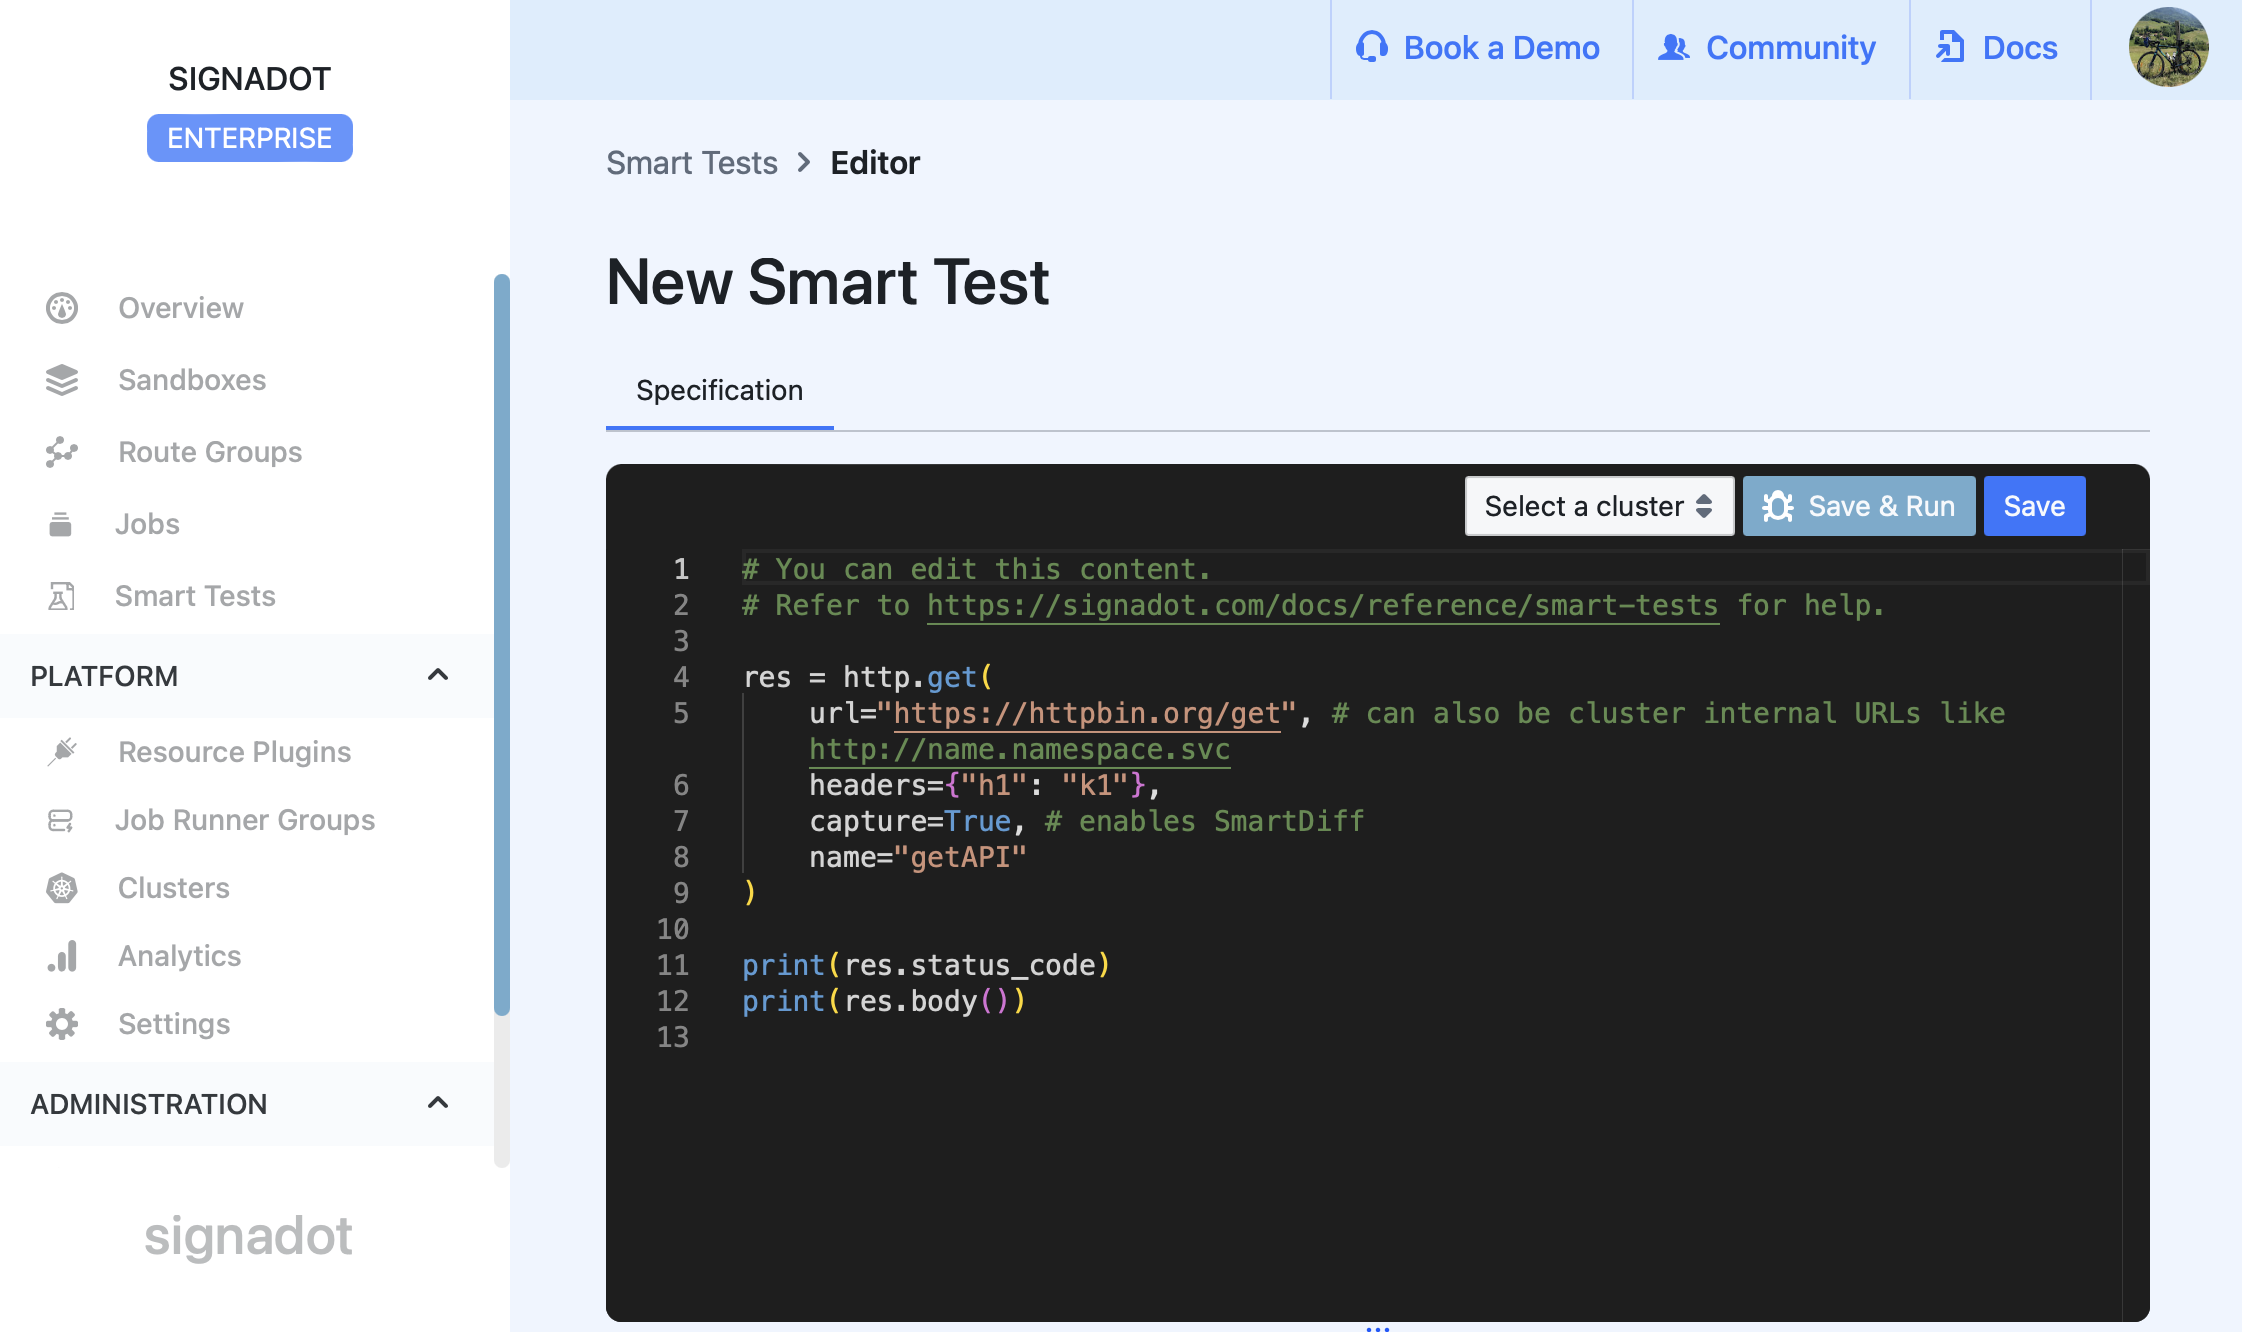
The examples below demonstrate two key features of synthetic tests. First, the capture=True parameter enables automatic analysis of API responses, detecting breaking changes between your baseline and sandbox environments. Second, the check() function lets you define specific conditions to validate, such as response codes or required fields.
Example: Health Check
res = http.get(
    url="https://httpbin.org/get", # can also be cluster internal URLs like http://name.namespace.svc
    capture=True,
    name="apiHealth"
)

ck = smart_test.check("api-health")
if res.status_code != 200:
    ck.error("Health check failed with status: {}", res.status_code)
Example: API Invariants
res = http.get(
    url="https://httpbin.org/get", # can also be cluster internal URLs like http://name.namespace.svc
    capture=True,
    name="apiCheck"
)

ck = smart_test.check("api-contract")
data = json.decode(res.body())

# Check required fields
required_fields = ["id", "name", "status"]
for field in required_fields:
    if field not in data:
        ck.error("Missing required field: {}", field)
Example: Response Time Check
# Measure response time
start = time.now()
res = http.get(
    url="https://httpbin.org/get", # can also be cluster internal URLs like http://name.namespace.svc
    capture=True,
    name="latencyCheck"
)
end = time.now()

# Check if response time is under 500ms
ck = smart_test.check("response-time")
if end - start > 500 * time.millisecond:
    ck.error("Response took too long: {} ms", (end - start) / time.millisecond)
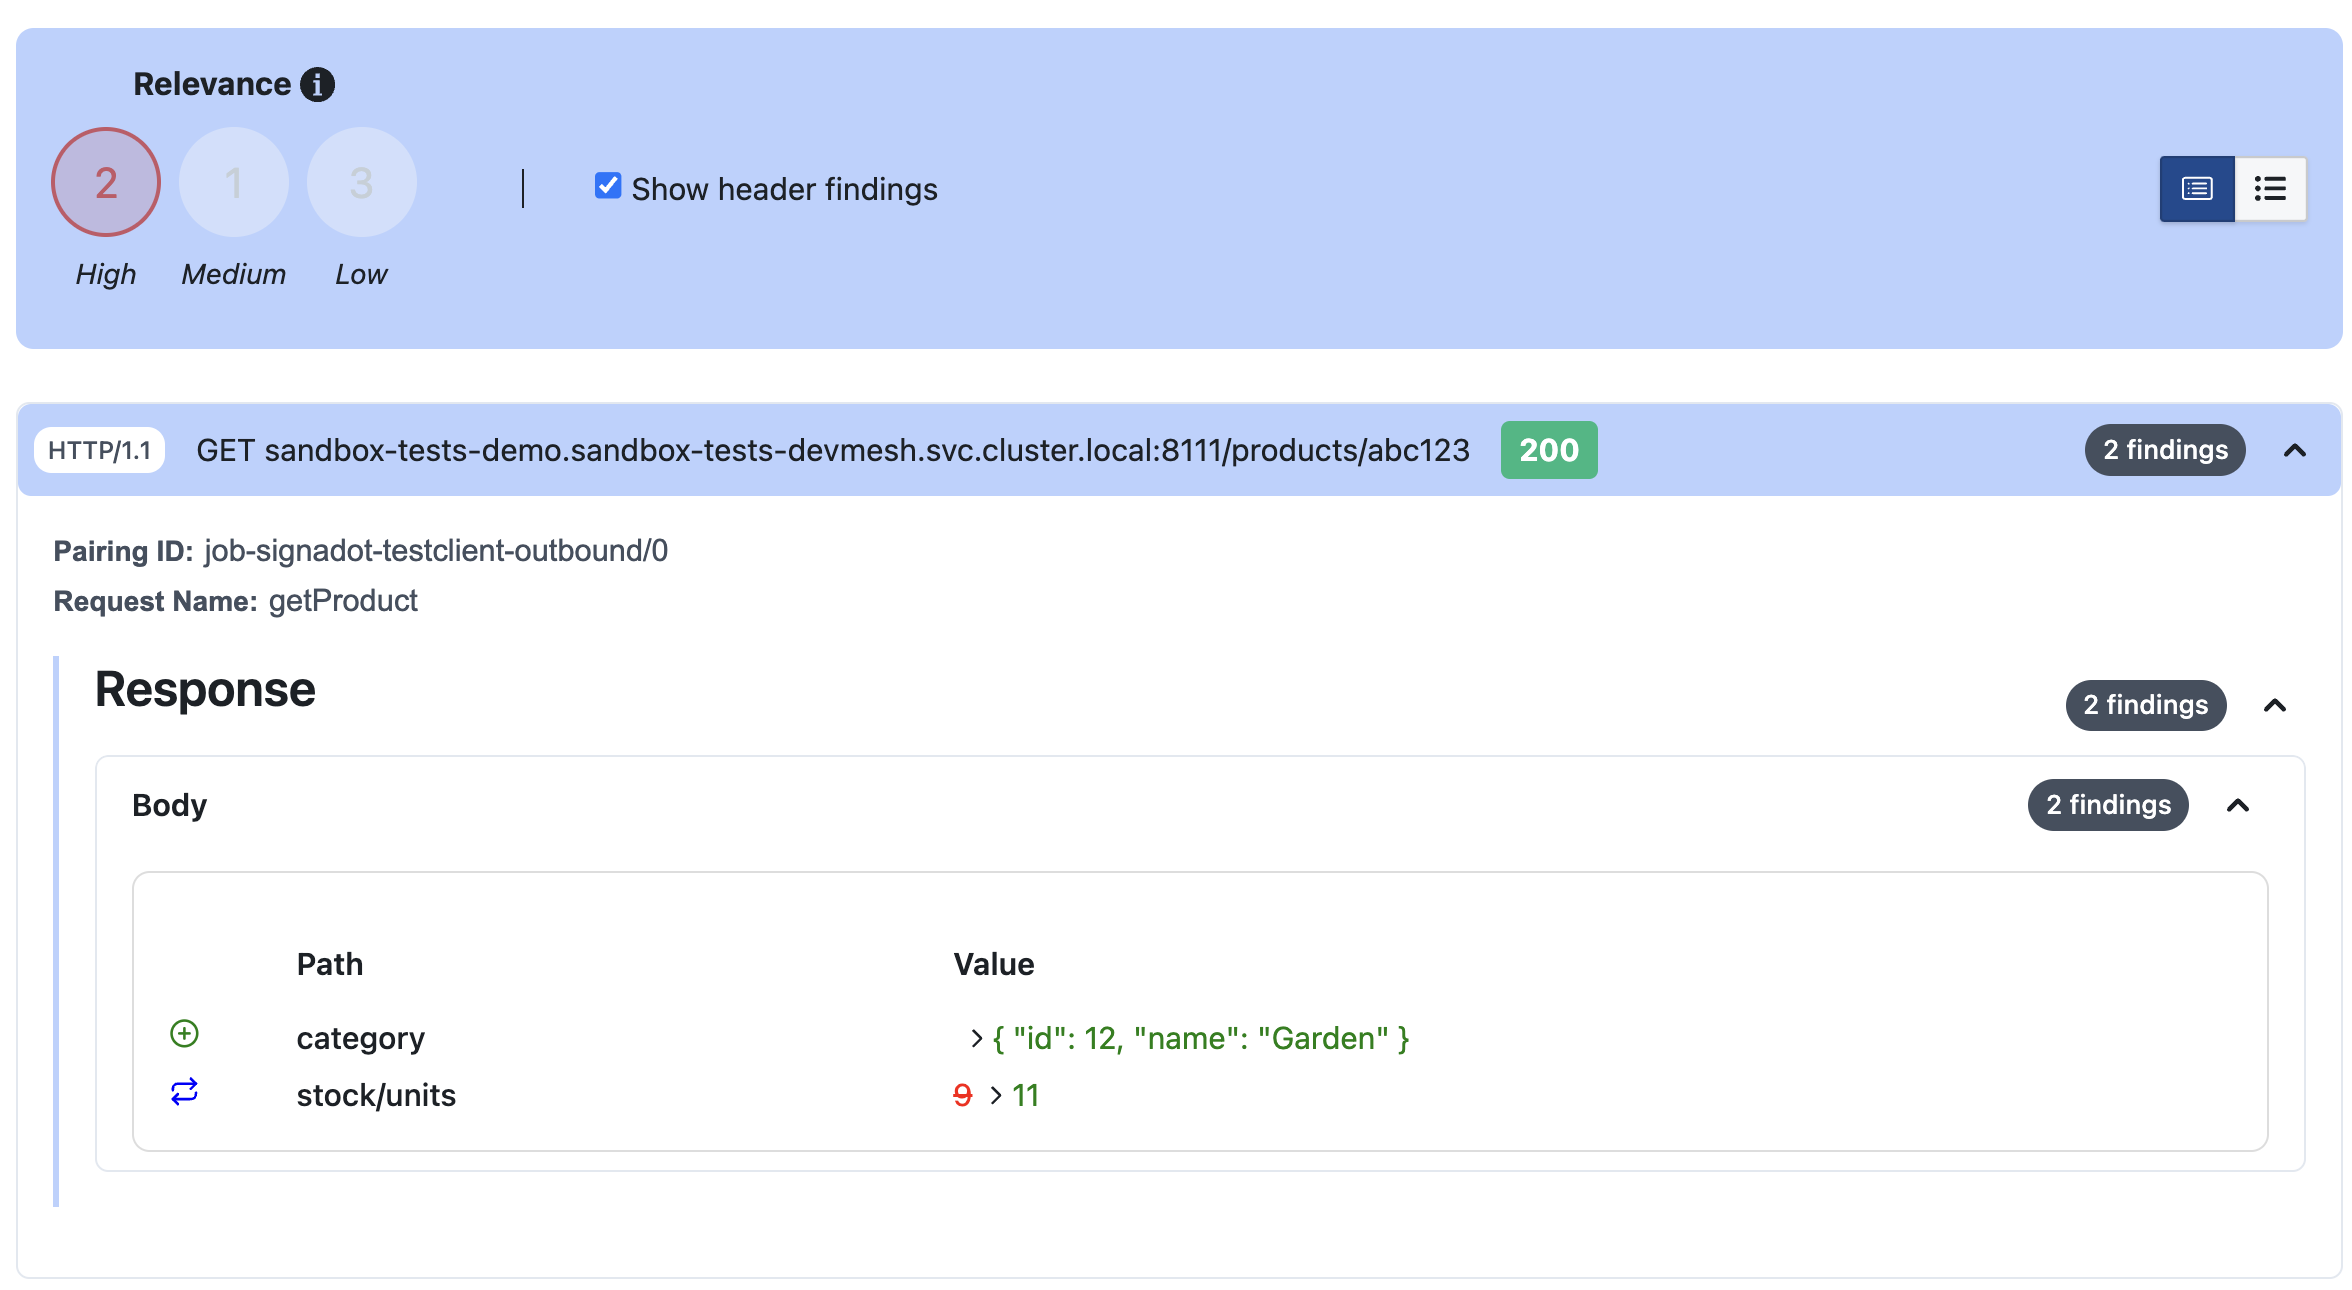
When these tests run, they provide two types of results. Your explicit checks (using check()) validate specific conditions and appear as pass/fail results. The captured API responses are automatically analyzed to identify potential breaking changes like modified field types or structural changes, with an AI model classifying changes based on their potential impact.
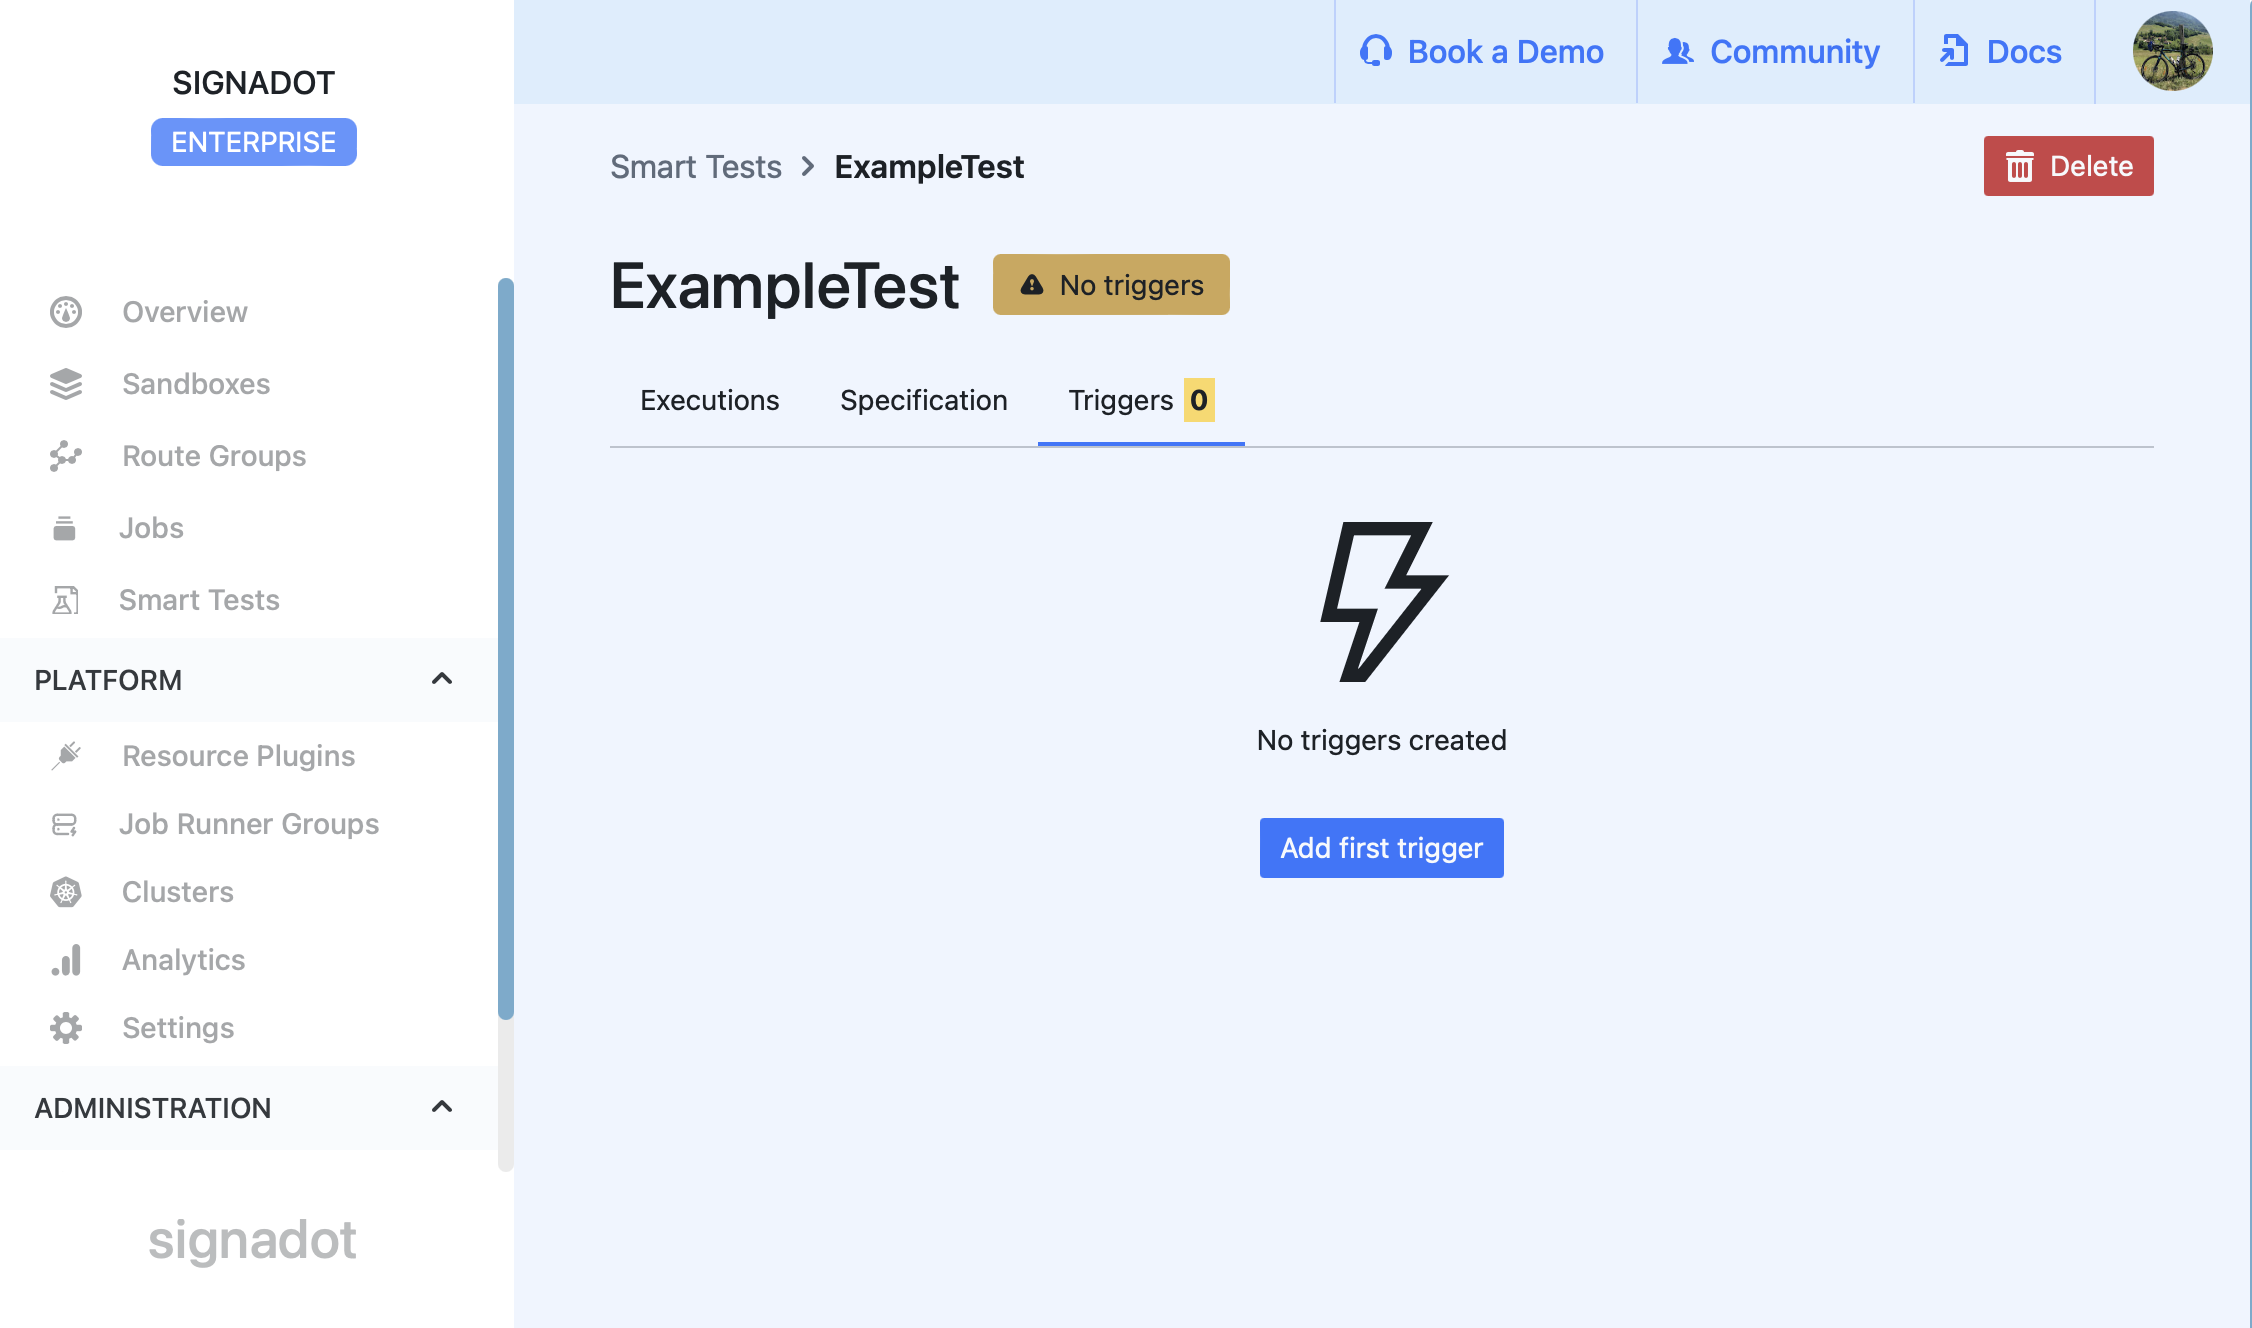
Setting Up Triggers
- Click the "Triggers" tab
- Select the target cluster
- Choose which changes should trigger the test
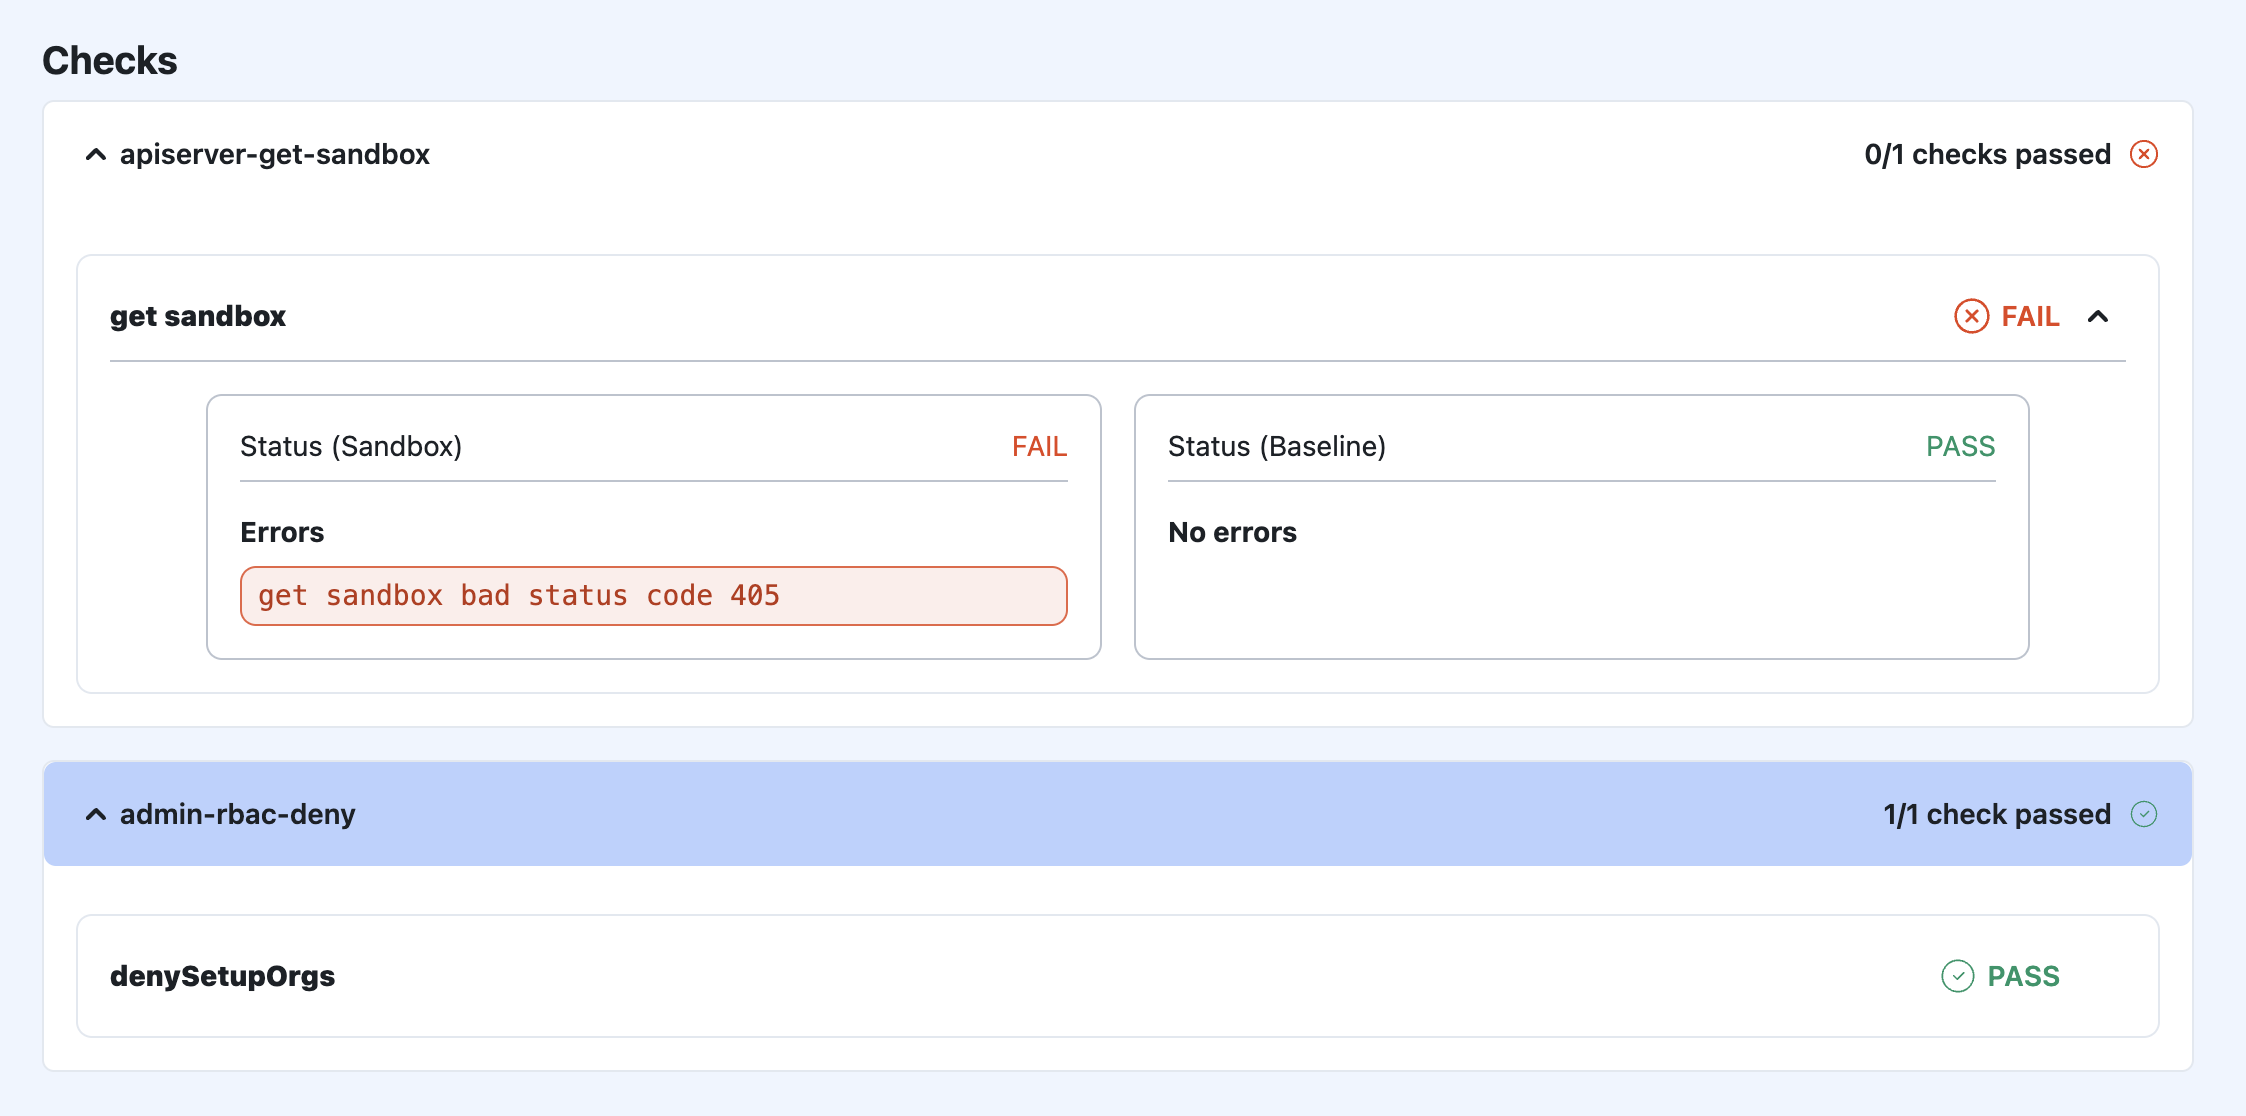
Test Results
The Signadot dashboard shows both your explicit check results and the automated API analysis:
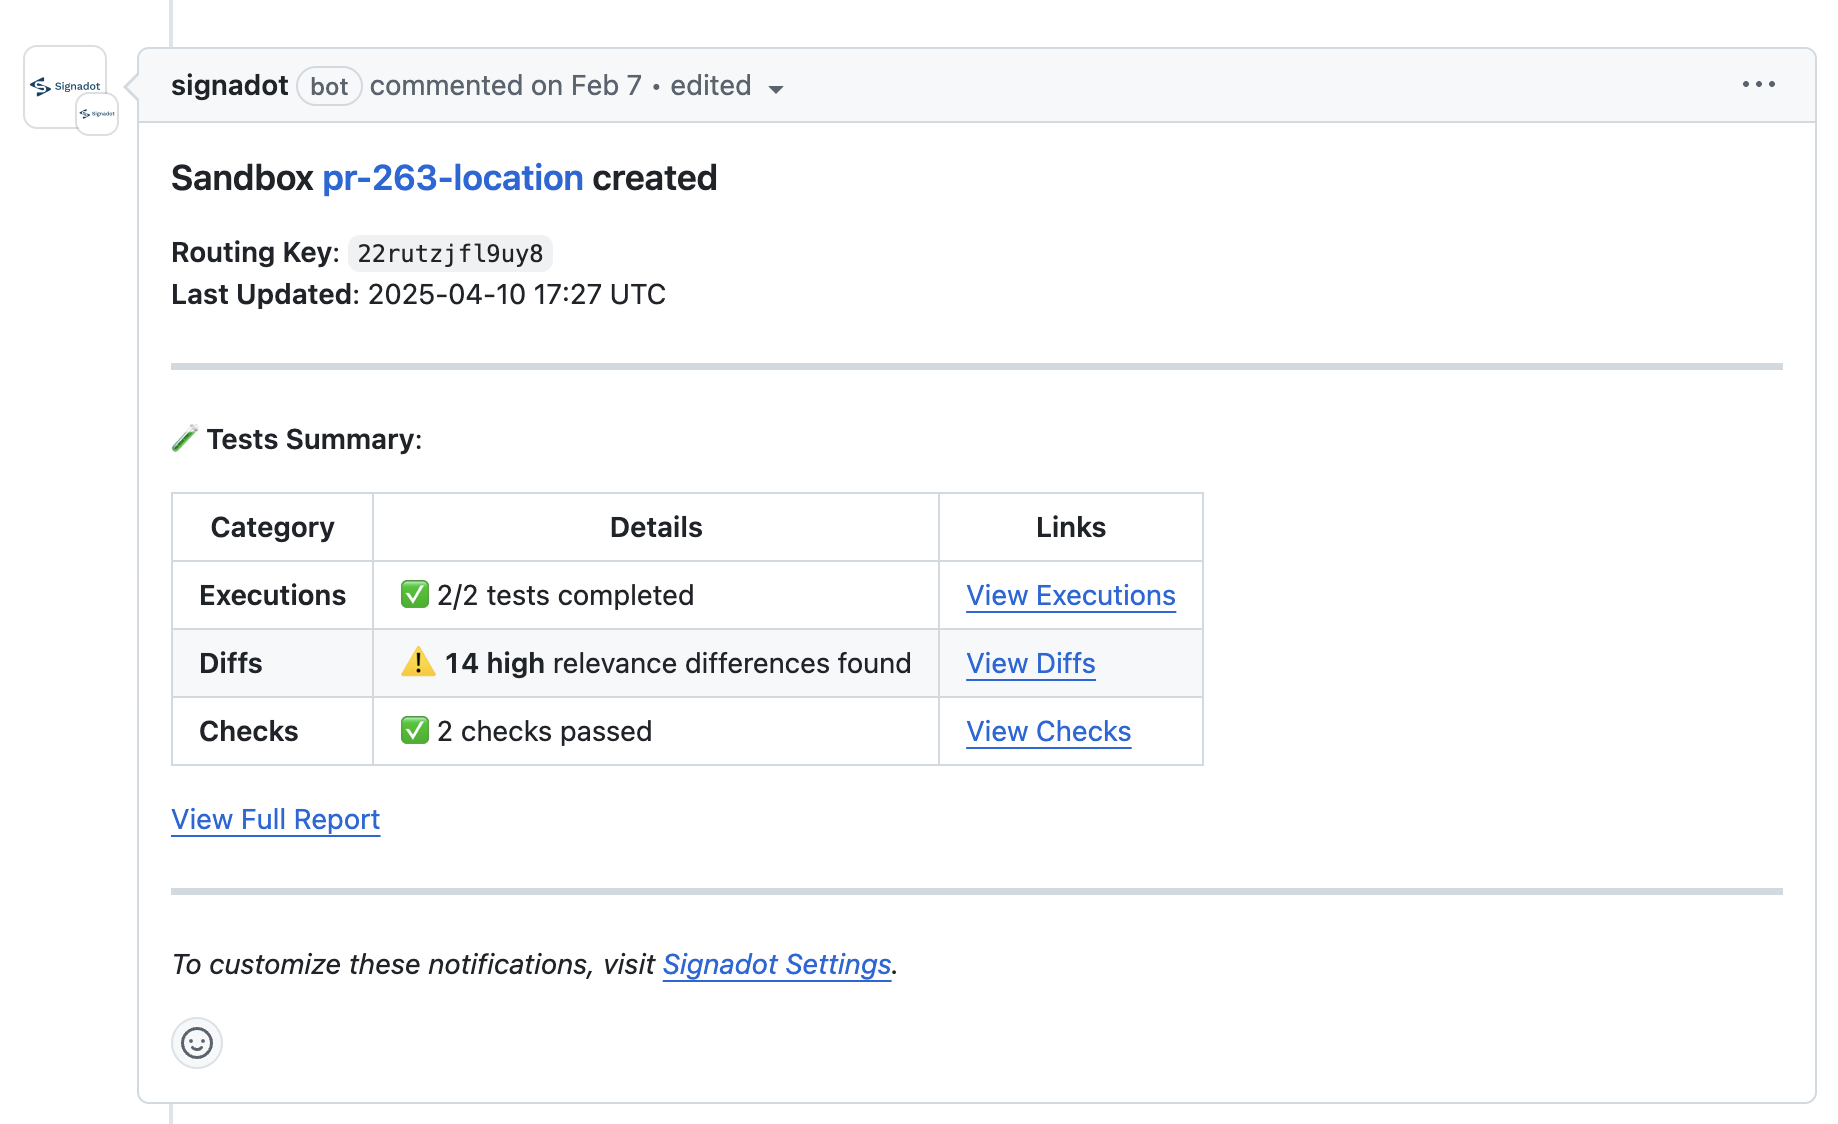
Developer Feedback
Test results can be integrated directly into your pull request workflow. If you're using GitHub, you can set up native integration to automatically post test results as PR comments:
For other version control systems, you can use the sandbox API to fetch test results and integrate them into your existing PR workflow.
Best Practices
-
Keep Tests Simple
- Focus on critical endpoints
- Monitor essential health indicators
- Use for basic validation
-
Test Organization
- One test per endpoint
- Clear, descriptive names
- Group related checks
Conclusion
Synthetic API tests provide a quick way to validate API behavior and catch breaking changes early in your development cycle. While they're perfect for basic health monitoring and invariant checks, consider moving to Git-based contract tests as your testing needs grow more complex or require version control and CI/CD integration.
To learn more:
- Check out our Smart Test Reference for in-depth documentation on test capabilities
- See our Smart Test Concepts for understanding the underlying principles